

How To Remove The Lower Control Arm
We are rarely bothered about the minor parts of our lives. Our cars are filled with such pocket-size parts that nosotros actually couldn't care less virtually. Even so, the harmonious coordination betwixt these components is what keeps a vehicle functional. One of them is the lower control arm bushing, also known as a control arm bushing.
This part is fitted onto the frame side of the vehicle'southward command arm. The location of the bushing might vary depending on break types; we will get to that subsequently.
In this article, nosotros discuss worn control arm bushing signs, function, location, and replacement toll in example the bushings have to be changed.
- Function
- Signs
- Common Causes
- Bushing Repair
- Replacing Control Arm Bushings
- Replacement Cost
- Aftermarket Vs. OEM parts
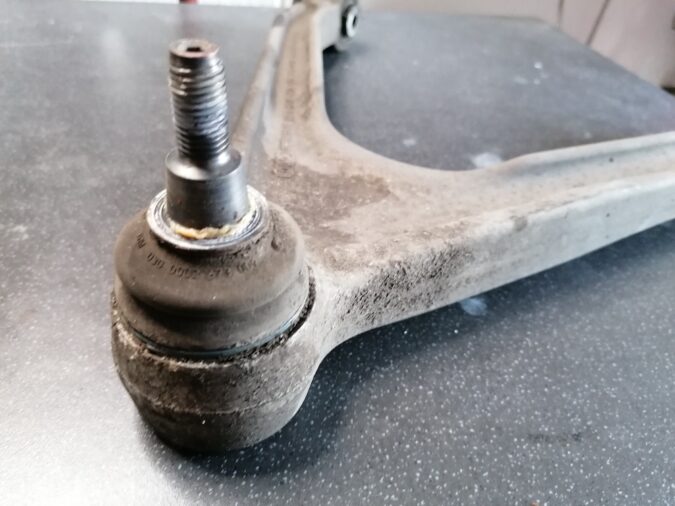
The Function Of The Lower Control Arm Bushing
The command arm bushing acts as a bridge betwixt the vehicle frame and its intermission. At that place are 2 kinds of control arms: the lower control arm and the upper control arm. The lower control arm comes with a side-mounted safe bushing that covers the metal parts constituting the connexion. In addition, the prophylactic absorbs a vehicle'southward vibrations from pocket-size jolts and shocks.
The rubber's effect is better than that of springs, thanks to its location. If the safety bushing contains grease within information technology will lubricate the part to decrease friction. A fundamental rod connects the metal sleeve protruding from the intermission's interior to the vehicle frame. The outer sleeve is linked to the wheels on two ends so the sleeves tin can move freely.
This is why the control arm and control arm bushing face a lot of stress during the rotation and movement of a vehicle. Over fourth dimension, these bushings get harder and brainstorm cracking – a state of affairs that can cause an assortment of problems.
Command Arm Bushing Location
The control arm can exist found on the command arm that is bolted to the frame side of the vehicle. A control arm is located at the finish of the suspension – close to the front pause. You tin can also find rear lower control arm bushing in the rear intermission of a 4WD, based on the kind of pause.
Lower Control Arm Bushing Symptoms
The nearly mutual lower command arm bushing symptom is losing vehicle stability at higher speeds. Chances are, you lot will also detect indications of trembling speed or uneven tire article of clothing. In some cases, a vibrating steering cycle may join the parade likewise!
Numerous signs volition tell you that your machine's control arm bushing is non operation properly. Y'all might notice a change in steering and comfort, but other problems may accompany the case depending on the seriousness of the situation.
1. Vehicle Stability Has Dipped
If a lower control arm bushing goes bad, yous will feel a reduction in driving stability. Every bit we mentioned already, the control arm bushing provides stability to a car. While you are driving, the vehicle moves over many things, from small stones to debris. The car will non vibrate if it rolls over the debris.
If the lower control arm bushings go bad, you might hear rattling sounds while driving, especially when you move the machine around. Nobody wants such an unpleasant driving experience.
two. Uneven Tire Wear
Since the lower control arm bushing keeps the ii metal sleeves tight and nice, the sleeves movement and vibrate when the vehicle moves. As this component is connected to the wheels through an outer sleeve, the command arm's motion can stop the wheels so they do not contract the road as much, which leads to irregular tire vesture (front tires).
iii. Steering Trembles
If you lot accelerate from a dead terminate, the steering might be wobbly and the front of the vehicle starts to jitter and milk shake when yous rotate the vehicle or trigger the brakes. This happens considering the command arm bushing experiences excessive play and does non secure the bicycle in position properly.
4. Reduced Braking Operation
Despite the command arm bushings having no directly link to the brake system, the component does impact vehicle braking. If the lower command arm bushings go bad, the braking might not exist afflicted greatly, simply it could get unstable. Thus, the front stop of the vehicle bounces abnormally due to the generated inertia when the vehicle stops.
Left unattended, this can create more issues in the hereafter. The excessive vibrations might brand other parts of the car come up loose or worse: break off.
v. Steering Wheel Vibrates
Connected to the steering system, the wheels are joined to the intermission through the control arms, therefore making a direct link between these parts and the steering wheel. If the steering wheel stands vibrating when braking or turning, bad control arm bushings may be the culprit, since they practice not dampen the small-scale vibrations that happen when steering and turning while driving.
Common Causes Of Lower Control Arm Bushing Noise
Weird clunking sounds coming from your auto are never a good sign. Although in that location might exist numerous reasons behind this unnatural behavior of your vehicle, an issue with the lower command arm bushing volition exacerbate the situation, thus, increasing the noise. If you pay attending, you volition detect this racket quite like to what you hear when someone knocks on your door.
There are v of the most common reasons backside a malfunctioning lower control arm bushing.
i. Worn Control Arm Bushing
Much similar virtually parts of a auto, bushings will not last forever. Over time and use, the bushings sustain wear and tear. You will first to hear a subtle clunking racket when the bushings are just starting to deteriorate, simply the sounds become more than consistent and louder with boosted article of clothing.
2. Loose Bushing
A loose lower command arm bushing will go knocked around within the metal parts surrounding it. This may non always mean that the bushings are bad. Maybe you drove over a large bump that knocked information technology out of place. Alternatively, a mechanic might have loosened information technology by mistake while working on related areas of the vehicle.
Whatsoever the case, loose bushings generate the same obnoxious knocking noises.
3. Broken Bushing
Lower command arm bushings may intermission from excessive wear and tear. We mentioned before how this part may sustain damage from a past repair session conducted past a mechanic. A cleaved component will result in loud clunking sounds. However, information technology will not get louder progressively similar with worn bushing.
four. Driving On Uneven Terrain
When you bulldoze over irregular terrains, like a rocky or gravel road, the clunking or knocking sounds volition become significantly amplified. On the other hand, a bushing in amend condition would not loosen up or rattle around when you drive over this sort of terrain. However, if the bushing is not in identify, the turbulent motion of the motorcar as its driven could farther loosen up the bushings.
5. Hard Acceleration
If the bushings of your vehicle are loose, the knocking sound will exist the loudest when you are starting from a standstill. Imagine your vehicle is parked in a garage, and you lot modify the gear to "Bulldoze" and press the gas pedal. At this point, the knocking will be the strongest.
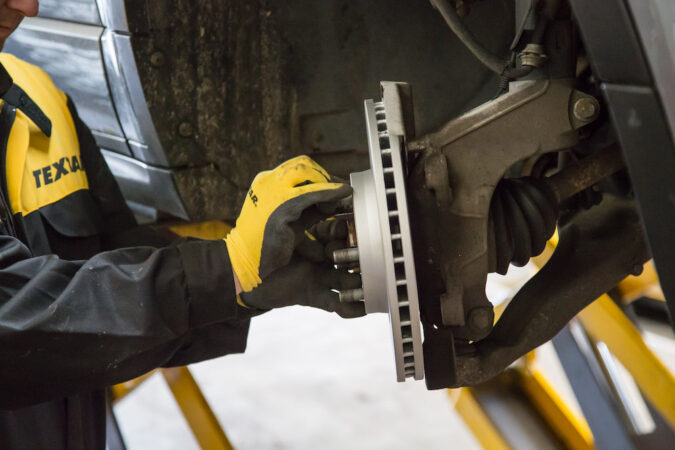
How A Mechanic Inspects A Lower Control Arm Bushing
Like many other suspension parts, the control artillery cannot be checked properly at a drive-thru fast-lube location. You can only inspect the lower command arm bushing by lifting the vehicle on a hoist. Automobile owners should be picky with their choice of go-to mechanic as an actual professional volition brand all the difference. They will make sure to check all parts of your vehicle regularly to continue abroad amercement from potential component decay.
If yous suspect something is wrong with your vehicle's suspension organisation, try to get information technology checked immediately. Some motorcar shops offer free inspection if you let them to ready whatever confirmed bug afterwards on.
Bushing Repair
Do you lot have some level of auto-repair expertise? You can put that to good use and repair the bushing yourself. This repair is non by and large that expensive but if y'all all the same want to save a few coins, cheque out this step-by-step guide.
To beginning, you must remove the wheels of your vehicle and jack it upward on the back up of jack stands. Also, make sure to wear gloves and protective eyewear before doing anything to your motorcar.
Stride ane: Brawl Joint Releasing
Start by releasing the joint. For that, you will need a big wrench (20mm – 24mm) or socket. Loosen the ball joint nut once the cotter pin is removed. Utilize a hammer to strike the control arm.
If you are doing the job on a suspension, utilise a hydraulic jack to hold the arm and then slowly lower it when the ball articulation is freed.
Footstep 2: Taking The Sway Bar Link Out
A sway bar link will connect the command arm to the sway bar. Take off the nut with a 14mm or 15mm socket or wrench. There might be a mini taper fit at this joint which you will have to stupor loose using a ball joint. Concord the sway bar link and have it away from the mount. By doing this you are moving the sway bar link out of the way.
Footstep iii: Take Off The Bolts
Two control arm mounting bolts will be property the fixture in position; they could exist vertical or horizontal. Use a 19mm – 22mm socket or wrench to free and remove the bolts. A few bolts volition incorporate a nut on the rear which will have to be secured by an extra wrench. As these bolts will be rigid, make certain the wrench or socket is safely placed on the commodities's head to forbid rounding.
Y'all tin can apply a universal socket and joint to extract the rear control arm bolt. One time the bolts have been removed, keep your hands on the arm as they might exist loose.
Step 4: Removing The Arm
In case the command arm remains on its mounts, grip the component with a steady hand and pull information technology outward. Move information technology upwardly and down to slowly release it from the frame mounts.
Pace 5: Supplant The Bushings
If you are only changing the bushings so follow up on this step. If you plan on changing the whole control arm, read upwardly to step vi of this guide. Find a lucifer for the sometime bushings. Make sure the match is identical. Press to remove the worn-out command arm bushings and install a new one.
Start by marking the orientation to confirm the right placement of the new bushing. If the bushing is installed incorrectly, it will tear during movement. Find the part so its flex role is in the aforementioned location as the erstwhile.
Identify the lower control arm in a hydraulic press and with a pressed cup and cone, strength the lower control arm bushing away from the arm. Y'all should be able to hear a "pop" audio when the bushing begins to motility.
Go on pressing the control bushing until it is removed entirely from the arm. Once the operation is washed, the control arm will be loosened. Then, you can gratis the press and take off the arm. Position the new command arm bushing into the lower control arm. Continue an eye on the marks from the old bushing. Make certain to not lubricate the bushing example it will permit the bushing get loose.
Straighten the press and carefully push button the new lower control arm bushing into position. The bushing has to stay straight during the primary press so it cannot dismantle the housing. When the printing has started the lower control arm bushing will remain straight.
Check the installation to ensure you have washed it correct and echo it on the other unit. One full lower control arm can be installed now.
Footstep 6: Reinstall The Lower Control Arm
Concur the rebuilt or new lower control arm, and button the bushing into its associated frame mounts. You may take to do an upwards and downwards movement to assist with the process. Equally you install the arm, observe the bolt holes to properly align them and place them dorsum into their holes. Utilize a screwdriver to do this as it will be hard without tools.
Once aligned, push the mounting bolts into the slot by mitt to preclude cross-threading. Practise non over-tighten the bolts till all the bolts are started. Place the lower brawl joint and wedge it into the command arm. You have to install the nut manually now. Push the sway bar link inside the command arm and reset the nut and sway bar link.
Once the basics and bolts have been installed yous can secure the front arm mounting bolts. Follow the torque specifications of the manufacturer which is generally between 65 to 75-foot pounds. This is when a universal socket and extension would be very helpful. Align the cotter pin holes while tightening the lower ball joint castle nut.
A universal socket and extension can aid when tightening the control arm bolts.
When you have tightened the nut, push the cotter pin. A cotter pin is needed to secure the nut in place. Continue the sway bar link straight while fastening the nut with a socket or wrench and y'all are all done!
Reassemble the wheel and bring the vehicle off the jack stands. We strongly recommend you go on the car aligned during this phase. When y'all offset drive the vehicle later the repair, listen for weird noises which are an indication that the job volition have to exist examined.
Can You Ready A Noisy Lower Command Arm Bushing Without Replacing It?
In the event of a loose bushing, chances are high that it was either not installed properly or was knocked loose. If you are lucky, you will be able to save information technology past simply tightening the bushing. Yet, in near scenarios, the culprit is a worn bushing that volition require replacement. Either fashion, take your vehicle for a cheque at a mechanic so they can do the replacement or repair for you.
Information technology is not a good idea to ignore the knocking or clunking sounds coming from your vehicle as it can lead to a steering issue where your vehicle will get out of control on the road. Try to resolve the issue at your earliest convenience.
Lower Command Arm Bushing Replacement
You should effort replacing all the control arm bushings at the aforementioned time, fifty-fifty if only one is worn. The others are likely to follow accommodate soon. Inspect the bushings for visible impairment like hollowing or vehement of the safety. Check the ball joints when the lower control arm bushing replacement is washed. Which bushing should be used to supercede the failed one depends on how you plan on using your vehicle. Original equipment (OE) bushings are constructed of rubber and deliver the comfiest driving experience.
In contrast, aftermarket operation bushings normally enhance treatment precision but may likewise brand the ride firmer. These crave regular lubrication for best functioning because the lubricant dissipates over time. A few aftermarket bushings are constructed of steel and are merely practiced for certain apartment race tracks since they give no control over shaking.
Lower Control Arm Bushing Replacement Price
Replacing an upper or lower control arm can price you anywhere between $160 and $390 for i arm. However, oft, if one arm has gone bad, the other control arm volition need replacement very presently. In this case, information technology is best to replace both of them at the same fourth dimension. After ane or both lower command arm bushings are changed, the wheel alignment process has to exist performed (about $60 to $120).
Should you replace the stabilizer bar links along with the lower control arm? The stabilizer bar is by and large linked to the lower control arms through stabilizer bar links. Occasionally, a nut that secures the stabilizer bar link can go seized and it would be impossible to call up it without damaging the articulation. In this instance, yous may accept to supervene upon the stabilizer bar links besides. In well-nigh vehicles, these links are quite cheap and do not need any additional labor hours to become done.
Worn-out lower control arm bushings can also be replaced individually. Merely, these demand to be pressed in identify using a special press or tool, which takes a fiddling time and counts as labor cost.
On a difficulty scale of one to 10, changing a lower command arm on your own gets a 7 or 8. It takes about an hr or ii to replace a control arm in the store.
Aftermarket Vs OEM parts
Although aftermarket parts are more inexpensive, they are notorious for displaying signs of accelerated wear and tear. Our advice is to consider the quality over toll when shipping for control arm bushing. These components contribute heavily to condom rides, especially in trucks and heavy SUVs. Utilize top-notch aftermarket parts or OEM components.
The reason why nosotros go along emphasizing the importance of properly working the lower control arm and control arm bushings is that you should need a soft steering input.
Is It Safe To Drive With A Bad Control Arm

You should not bulldoze with a bad lower control arm as it is unsafe and unsafe. At any moment yous may lose command of the steering wheel, causing your vehicle to pull to one side and maybe resulting in a collision. If you are cruising on the highway at 65, you do not need one more distraction added to the list; at that place are plenty of cars and trucks around you for that. Adding a malfunctioning control bushing makes it riskier.
Bottom Line
When a small component can make all the departure in your vehicle, it is foolish to take it lightly. The lower command arm bushing plays a key role in a vehicle's suspension system. Whenever you lot hear a clunking noise, prioritize getting that checked earlier everything else.
Ofttimes Asked Questions (FAQs)
What Is A Bushing
Bushings are similar to narrow tubes most frequently used for equipment with sliding or rotating shafts to reduce noise and vibrations while improving efficiency.
How To Remove Lower Control Arm Bushing
To remove the lower command arm bushing you will need a hydraulic printing. This releases rigid joints.
How To Supercede Lower Control Arm Bushing
Follow the "Bushing Repair" guide in a higher place to learn how to supplant the lower control arm bushing or check out this video.
Approved Tools
These tools have been tried and tested past our squad, they are platonic for fixing your auto at home.

Source: https://www.motorverso.com/lower-control-arm-bushing/
0 Response to "How To Remove The Lower Control Arm"
Post a Comment